The Essentials of Silkworm Care for a Successful Home Sericulture Setup
Raising silkworms at home is one of those quiet, satisfying projects that connects you directly to a craft thousands of years old. I started my first batch of Bombyx mori out of curiosity, and I quickly learned that silkworm care demands a balance of patience, observation, and a few non-negotiable routines. If you are thinking about starting your own small sericulture operation, the basics are straightforward, but the details matter more than most beginners expect.
The first thing to understand is that Bombyx mori is a domesticated insect. It cannot survive without human help. That means your role is to mimic the conditions it evolved under in captivity: clean space, steady temperature, and a constant supply of fresh mulberry leaves. I have seen people treat silkworm care like a weekend hobby and then struggle when the larvae outgrow their container or the leaves wilt too fast. It is not hard work, but it is daily work.
Getting Started: Eggs and Early Larvae
Silkworm eggs are tiny, about the size of a pinhead, and they arrive on a piece of paper or cloth. You will want to keep them in a cool, dry place until you are ready to hatch. Once you move them to a warmer spot, around 24, 26 degrees Celsius, they start to develop. Within a week or two you will see tiny silkworm larvae emerge, and that is when the real work begins.
Newly hatched larvae need the smallest, tenderest mulberry leaves you can find. I prefer the leaves from a young Morus alba tree because they are softer and less fibrous. Chop the leaves into fine strips at first, because the tiny mouths cannot chew through a whole leaf. This early stage is delicate. A single day without fresh food can stall growth or kill the larvae outright. I learned that the hard way when I left town for a weekend and left a pile of leaves that dried out by the second day. Now I always have a backup supply of leaves in the refrigerator, sealed in a plastic bag, to stretch their freshness.
Rearing Trays and Space
You do not need expensive equipment. Rearing trays can be simple plastic storage boxes, shoeboxes, or even shallow cardboard boxes lined with newspaper. The key is ventilation and space. As the silkworm larvae grow, they need room to move and feed without piling on top of each other. Overcrowding leads to stress, uneven growth, and sometimes disease. I use trays that are about 30 by 40 centimeters for a batch of 200 worms, and I split them into two trays once they reach the third instar.
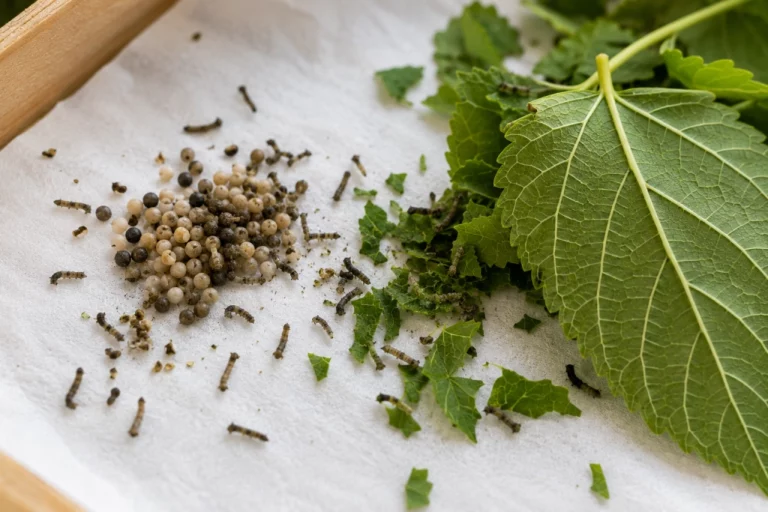
Hygiene is the single most underrated part of silkworm care. Frass, which is a polite word for silkworm droppings, builds up fast. Combined with leftover leaf stems and moisture, it creates a perfect breeding ground for mold and bacteria. I clean the trays every day, removing old leaves and frass, and replacing them with fresh leaves. It takes five minutes per tray. Skipping a day is risky. I have lost a whole batch to a mold outbreak that started because I left damp leaves in the corner of a tray.
Feeding: Mulberry Leaves and Alternatives
Mulberry leaves are the gold standard. Bombyx mori evolved to eat them, and they will thrive on nothing else for the long term. If you live in an area where mulberry trees grow, you can harvest your own. I have a single Morus alba tree in my backyard that produces enough leaves for two full batches per season. The leaves should be fresh, dry, and free of pesticides. If you pick them after rain, let them air dry before feeding, because wet leaves cause diarrhea in silkworms.
There is also commercial silkworm feed available, usually a powder you mix with water to form a paste. I use it occasionally when the mulberry tree goes dormant or when I need a consistent diet for a scientific experiment. The feed works, but it is more expensive and the worms grow slightly slower. For a home hobbyist, fresh mulberry leaves are still the best option. If you have access to a mulberry tree, you are set. If not, consider planting one or finding a neighbor who will let you harvest.
Temperature Control and Humidity
Silkworms are cold-blooded, so their environment dictates their metabolism. The ideal temperature range is 24 to 28 degrees Celsius. Below 20 degrees, they slow down and stop feeding. Above 30 degrees, they become stressed and can die. I keep my trays in a spare room that stays at about 26 degrees, and I use a small space heater in the winter. A simple thermometer inside the tray area helps me spot fluctuations before they cause problems.
Humidity matters too. Low humidity dries out the leaves and the worms, while high humidity encourages mold. Aim for 60 to 70 percent relative humidity. If the air in your house is dry, you can place a shallow pan of water near the trays. If it is humid, increase ventilation. I have a small fan on low speed that moves air gently across the trays without blowing directly on the worms.
The Life Cycle: From Larvae to Moths
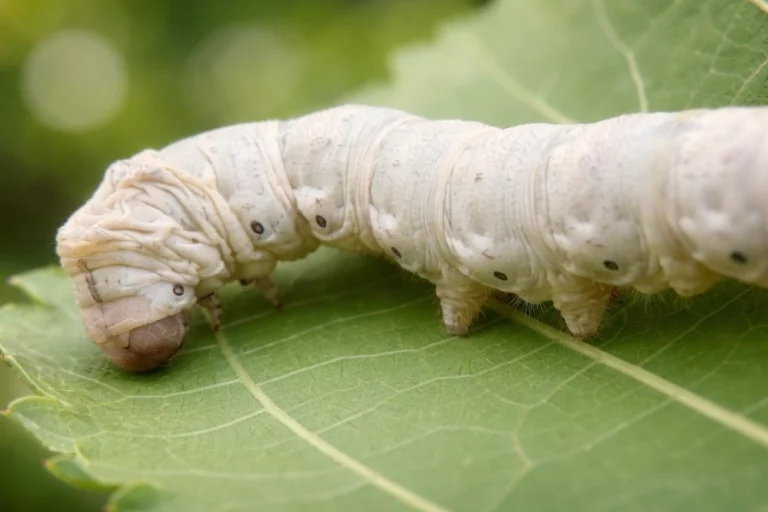
The silkworm life cycle is a fascinating process to watch. After about four weeks of feeding and growing, the silkworm larvae stop eating and start looking for a place to spin. They become restless and translucent. This is the spinning stage. I offer them small twigs or a bundle of straw, or simply leave the cardboard dividers from the rearing trays. They climb up and begin to spin a single continuous thread of silk around themselves, forming a cocoon.
The chrysalis inside the cocoon metamorphoses over two to three weeks. If you are raising silkworms for silk harvesting, you typically boil the cocoons before the moths emerge. That process kills the chrysalis and preserves the continuous silk thread called grège. But if you want to breed your own stock, you let the silkworm moths emerge naturally. The moths cannot fly and live only a few days. Their sole purpose is reproduction. After mating, the female lays silkworm eggs, and the cycle starts over.
Harvesting cocoons for silk requires timing. If you wait too long, the moth emerges and breaks the silk thread. If you harvest too early, the cocoon is not fully formed. I wait until the cocoon feels firm and the worm inside has stopped moving. Then I either set them aside for breeding or process them for silk. If you are new to sericulture, I recommend letting a few cocoons hatch so you can see the moths and understand the full life cycle.
Common Problems and Diseases
Silkworm diseases can wipe out a batch in days if you are not careful. The most common issues I have dealt with are flacherie, a bacterial infection that causes the larvae to go limp and turn dark, and muscardine, a fungal disease that covers the body in white spores. Both are linked to poor hygiene and high humidity. The best prevention is clean trays, dry leaves, and good airflow. If you see a sick worm, remove it immediately and check the rest of the batch.
Another issue is leaf quality. Leaves that are too old, too wet, or contaminated with pesticides can cause vomiting, diarrhea, or death. I learned to pick leaves from the same tree I know is untreated, and I wash them only if they are visibly dusty, then dry them thoroughly. It sounds fussy, but silkworm care is fussy by nature. The reward is watching healthy larvae grow into fat, glossy caterpillars that spin perfect cocoons.
Practical Tips for Beginners
If you are starting your first batch, here are a few things I wish someone had told me:
- Start small. Fifty eggs is plenty for a first trial. You can always scale up.
- Keep a notebook. Record temperature, feeding times, and any changes in behavior. Patterns become obvious when you write them down.
- Do not overfeed. Put enough leaves for one day, not three. Fresh leaves every day are better than a pile of wilted leaves.
- Watch for molting. The larvae stop eating for up to 24 hours before they shed their skin. Do not panic. Leave them alone.
- Separate the cocoons as soon as they are spun, or the moths will mate and lay eggs all over the tray.
I still remember the first time I saw a silkworm moth emerge. It was clumsy and beautiful, and it made me appreciate the whole process in a new way. Silkworm care is not just about producing silk or having a science project. It is about being responsible for another living thing through its entire life. That responsibility teaches you consistency, observation, and a bit of humility.
Final Thoughts on the Practice
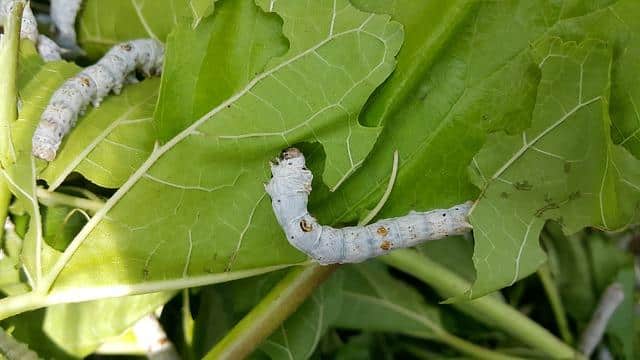
Good silkworm care comes down to three things: fresh food, clean space, and steady temperature. Everything else is detail. The more you practice, the more you notice small signs. A slight change in leaf consumption tells you the larvae are about to molt. A drop in activity warns of a temperature shift. Over time, you develop an intuition for what they need.
If you are serious about sericulture, invest time in learning about the mulberry tree, the specific needs of Bombyx mori, and the local climate. Connect with other hobbyists online or at local agricultural fairs. The community is small but generous, and I have learned more from other keepers than from any book. The most important thing is to start. Order some silkworm eggs, prepare your rearing trays, and dive in. You will make mistakes, but each mistake teaches you something about the delicate balance of raising these ancient insects.
