Exterior Lighting Denver: Motion and Dusk-to-Dawn Tips
Twilight lingers a little differently along the Front Range. In summer, family dinners drift onto patios under a wide western sky, and by October the night comes early, sometimes with a fast snow squall. Good exterior lighting keeps the path steady across those seasons. In Denver, that usually means a blend of motion sensing for activity and dusk-to-dawn control for background safety, both tuned to our altitude, dry air, and long freeze-thaw cycle.
What follows draws on years of planning and servicing denver exterior lighting from Hilltop to Wheat Ridge, along with lighting installations Denver homeowners have asked to fix after a storm or a false alarm kept them awake. Motion and photocell lighting are simple ideas. Doing them well takes a bit of placement sense, some smart restraint, and materials that shrug off Colorado sun.
How motion and dusk-to-dawn lighting differ, and why you usually want both
Motion-activated lights turn on when people, animals, or vehicles cross a sensor’s field. Dusk-to-dawn lights rely on a photocell to respond to ambient light. Each has a place around a house, and neither replaces the other. A sidewalk or steps benefit from consistent low-level light all night, especially when the first frost hits and a stoop turns slick. A side gate or alley-facing garage door, on the other hand, often works best with nothing on until someone approaches.
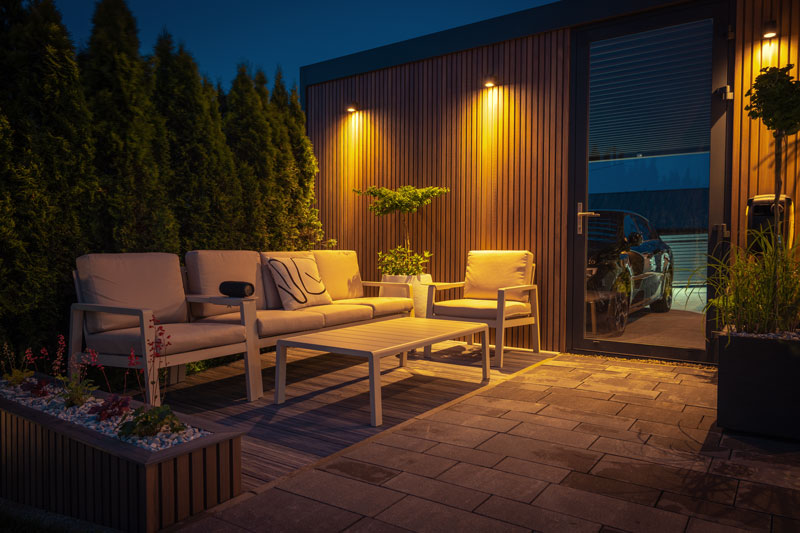
I tend to group dusk-to-dawn as the backbone of denver outdoor lights, then layer motion selectively where activity varies. That structure makes energy and privacy sense. It also respects neighbors and the night sky, which matters here. Denver sits at 5,280 feet, with cleaner, drier air than most cities. Light scatters differently, and glare can feel harsh. Keep the backbone warm and shielded. Let motion handle the rest.
The Denver and Colorado factors that shape outdoor lighting
Altitude is not kind to cheap finishes. At a mile high, UV exposure degrades plastics and thin powder coats in a couple of summers. I have pulled chalked, brittle sensor heads off fixtures that were fine electronically but dead mechanically. Spend on finish and gasketing for colorado outdoor lighting, not just lamp output. Look for die-cast aluminum with a robust powder coat, marine-grade stainless fasteners, and silicone gaskets rated for wet locations. Acrylic and especially low-grade polycarbonate lens covers haze quickly; glass or UV-stabilized polycarbonate holds up better.
Freeze-thaw is the second villain. Water will find its way into junction boxes, conduit threads, and set screws. When it freezes, it expands. If your denver outdoor fixtures use set screws to aim heads, hit the threads with a dab of anti-seize and cycle them once a season. On deck and fence posts, ensure weep holes are clear. I see shorts and intermittent photocell cycling every March when meltwater wicks into splices that were fine all winter.
Snow reflectance is the quiet 3 a.m. Problem. After a fresh snow, any bright wall pack can bounce enough light off a driveway to feed its own photocell and cause rapid on-off cycling. That same reflectance doubles apparent brightness and glare. Shielding and warmer color temperature on dusk-to-dawn lights help tame this. For landscape lighting Denver yards with light-colored stone or snow cover, position fixtures so their beams graze surfaces rather than blast them.
Wind matters in the foothills. On exposed corners in Golden or near Chatfield, a lightly mounted flood can shiver just enough to trigger a sensitive sensor. If your property sits in a windy pocket, choose fixtures with firm, multi-point mounts and sensors with adjustable sensitivity or masks.
Wildlife comes up more often as subdivisions press against open space. Rabbits, raccoons, foxes, and even the neighbor’s cat outdoor lighting denver will trip a wide, low-mounted sensor. So will layered plantings in a denver garden lighting plan when new growth fills in by June. In those cases, mount sensors higher, narrow their zones, and rely more on dusk-to-dawn for near-ground illumination such as denver pathway lighting.
Sensor technology in plain terms
Most motion systems in outdoor denver lighting use passive infrared, or PIR, which spots changes in heat across zones of view. PIR is reliable when aimed correctly and less fussy about radio interference. It struggles in very cold or very hot extremes when contrast between background and moving bodies narrows. Denver’s swingy shoulder seasons are a good fit for PIR, though a January snap can make pets and people look similar to a low, wide sensor.
Microwave sensors detect motion through Doppler shift. They can “see” through thin materials like vinyl and glass, which is not always a plus. I use them sparingly outdoors, mostly on enclosed porches or soffits where PIR would see ambient temperature swings from sun and shade. If you live along a busier street in Park Hill or Capitol Hill, a microwave sensor aimed toward the sidewalk will likely catch every passing car. Save those for specialty cases.
Dual-technology sensors, common indoors, are trickier outdoors due to weather sealing. If you want the reliability that comes from two technologies agreeing on motion, consider a separate camera-based system integrated with your exterior lighting. Many clients in outdoor lighting Denver projects settle on PIR for the yard and camera-triggered scenes along the driveway.
Photocells deserve a note of their own. A quality photocell ignores a quick flash of headlights and reacts to a change over several seconds. Cheaper units respond too fast and, when mounted near a light source, cause that strobing on-off cycle. When adding dusk-to-dawn to a denver outdoor illumination plan, mount photocells under eaves or in shaded zones and away from reflective surfaces.
A quick field checklist for sensor placement
- Mount PIR sensors between 6 and 10 feet high, angled slightly downward to cut sky and street views.
- Keep sensors at least 10 feet from HVAC exhausts, dryer vents, or swaying plants.
- Use the sensor’s mask or shutters to narrow coverage away from sidewalks and neighbors’ yards.
- For garages facing alleys, set time-on to 2 to 5 minutes, then fine tune after a week of real use.
- Separate photocells from the light they control, or shield them, to prevent self-triggering.
Color, brightness, and glare control that fit the Front Range
Color temperature shapes how your home reads from the street and how your eyes feel walking at night. For background dusk-to-dawn lighting installations Denver homeowners usually prefer 2700 to 3000 Kelvin. It is warm without going orange, respectful of architecture, and gentler on circadian rhythms. Security floods sometimes come in at 4000 Kelvin or higher. Those can look clinical and blow out contrast on snow. If you need a cooler tone for camera visibility near the garage, compromise at 3000 to 3500 Kelvin and keep the beam tight.
Brightness works better in layers than in single-point blasts. A 900 to 1200 lumen wall sconce at 3000 Kelvin, fully shielded with a cutoff top edge, does more useful work than a 2500 lumen bare lens fixture that sends half its light into the sky. For denver landscape lighting, small 2 to 4 watt LED path lights at 200 to 300 lumens each, spaced 6 to 10 feet, create legible edges without runway glare. You can then add motion floods for task light where needed.
Cutoff optics and louvers are your friend. In older neighborhoods with narrow lots, light trespass gets neighborly feedback fast. Use fixtures with full cutoff or add shrouds. Aim beams just to the edge of your target surface. With denver yard lighting, bounce light off walls, fences, and plant masses where possible. It spreads illumination softer and hides the source.
Color rendering index, or CRI, gets less attention outdoors than it should. A CRI of 80 is fine for navigation. If you host on the patio or display landscaping near the house, spend a little more for CRI 90 modules. Greens and warm woods look truer, and brick regains nuance.
Wiring that holds up year after year
Line voltage at 120 volts powers many porch, garage, and wall fixtures. Landscape lighting Denver projects often use 12 volt low-voltage systems driven by a transformer. Both can be controlled by motion and photocell inputs, but the wiring and protection differ.
For line-voltage motion or dusk-to-dawn retrofits, I like fixtures with integrated, replaceable LED engines rather than screw-in lamps. The engines run cooler and seal better. If you are adding a motion sensor to an existing circuit, choose a sensor rated for the load and motor type, and expect to provide a neutral conductor at the switch location. Many Denver houses built before the 90s lack a neutral in switch boxes. That is a fine time to involve a licensed electrician.

Low-voltage systems reward planning. Voltage drop on long runs makes far fixtures dimmer. Use a hub-and-spoke layout or heavier gauge cable for outdoor lighting systems Denver yards with long perimeters. Keep low-voltage wire outdoor lighting services denver at a shallow, consistent burial, typically a few inches below grade, and protect it near edging and aeration paths. I have repaired far too many chewed or sliced leads because someone ran wire tight to a lawn’s edge with no slack.
GFCI protection is not optional outdoors. Replace aged exterior receptacles with in-use covers and check that your transformer location remains dry in a storm that blows rain sideways. Mount transformers off the ground on masonry or pressure-treated backboards, and leave a drip loop on every exterior penetration. On masonry walls, use silicone or an appropriate sealant compatible with the substrate. On siding, add a proper block to prevent water channeling.
Control strategies that save energy without sacrificing comfort
Smart controls do well here if you use them sparingly. A Wi-Fi switch or bridge makes seasonal adjustments painless. Sunset in Denver jumps nearly two hours from June to December, and photocells can be tricked by bright winter afternoons. Program sunset offsets for your dusk-to-dawn scenes, and add a midnight dim step for decorative zones.
For motion zones, set a short dwell time and let a background glow handle navigation. In an alley-facing garage, for instance, run soffit lights at 20 to 30 percent from dusk to dawn and let motion spikes bring the driveway floods to full brightness for a couple of minutes. That pattern reads less like a beacon to passersby and still gives you what you need to unload the car.
The old-school double-toggle override still earns its keep. Many motion fixtures allow a manual on if the wall switch is flipped off then on within a second or two. Learn the trick and label the switch inside the garage. In a few homes, I add a small pilot light at the switch to remind people they have forced a zone on.
Zoning the property, with what typically works in Denver
Front entries deserve constant, modest light. A pair of shielded sconces at 3000 Kelvin and 800 to 1000 lumens each, on a photocell, make a home feel cared for and make steps obvious. I rarely put motion on the front door in denver outdoor lighting because pets, delivery drivers, and tree sway create a strobe show.
Driveways and garages benefit from two layers. Put architectural or soffit lights on dusk-to-dawn at a low level. Add motion floods aimed down the drive, with masked sides to avoid the street. Mount at 8 to 11 feet on the garage face or soffit to keep their field tight and predictable.
Side yards and gates, especially those opening to alleys, are prime motion zones. Keep sensors just inside your property line, not aimed outward. If you have a dog run, mount higher and narrow coverage to reduce false triggers.
Back patios and decks lean warm and welcoming. I like a dimmed dusk-to-dawn baseline for egress and then scene-based bumps via wall controls or smart dimmers. If you use overhead string lights, run them on a separate path from motion floods. Keep string connectors under cover, away from winter ice.
For denver landscape lighting, graze walls and specimen trees rather than uplight everything. Use narrow beams on trunks and broader, softer beams through foliage. In winter, those same fixtures will catch branch structure against the sky. Path markers can take dusk-to-dawn control if the run is efficient; otherwise, a late-night shutoff saves energy.
Respecting neighbors and the night sky
Denver’s neighborhoods vary block by block. What feels appropriate in Lowry may feel bright in Berkeley where lots are tight and porches sit close. Shielding, aiming, and lumen restraint solve most complaints. If you can see the source of your neighbor’s light from your bedroom, they can likely see yours. Choose full-cutoff fixtures and add optional visors for floods. Avoid bare LED chips in sight lines. A frosted lens or internal baffle lowers contrast without killing useful output.
Dark-sky guidance is not a legal code for most residential sites, but it offers a practical path. Keep color temperature at or below 3000 Kelvin for dusk-to-dawn zones. Use timers to shut down decorative layers after reasonable evening hours. Save high-output motion floods for real tasks, not to spotlight a yard at 2 a.m.
What it costs to run, with real numbers
Residential electricity rates along the Front Range vary by season and tier. A fair planning range is 12 to 18 cents per kilowatt-hour. A pair of front sconces at 10 watts each, running 12 hours per night on average across the year, use about 87 kilowatt-hours annually. At 15 cents, that is roughly 13 dollars per year. A driveway flood at 25 watts, triggered 20 times nightly for three minutes each, adds around 9 kilowatt-hours per year, near a dollar and change. You can afford a warm baseline and targeted motion if you keep wattage civilized.
High-wattage legacy fixtures, the kind that still show up in older outdoor lighting in Denver, swing those numbers hard. A single 150 watt halogen on dusk-to-dawn can clear 200 dollars a year if left unchecked. Modern LED replacements pay for themselves in a season or two, even before you count less maintenance.
When to call a pro, and what to handle yourself
Swapping a bulb or adjusting a sensor is weekend work. Adding a new 120 volt fixture or taming a mess of wire nuts in a damp box is not always. If you see aluminum branch wiring, corroded grounds, or no neutral at a control location, get a licensed electrician. In wetter microclimates along waterways, ask for in-use covers and weatherproof boxes specifically rated for wet locations. If a transformer hums loudly or trips a GFCI whenever snow melts, there is likely a grounding or wicking issue better solved with new enclosures than with tape.
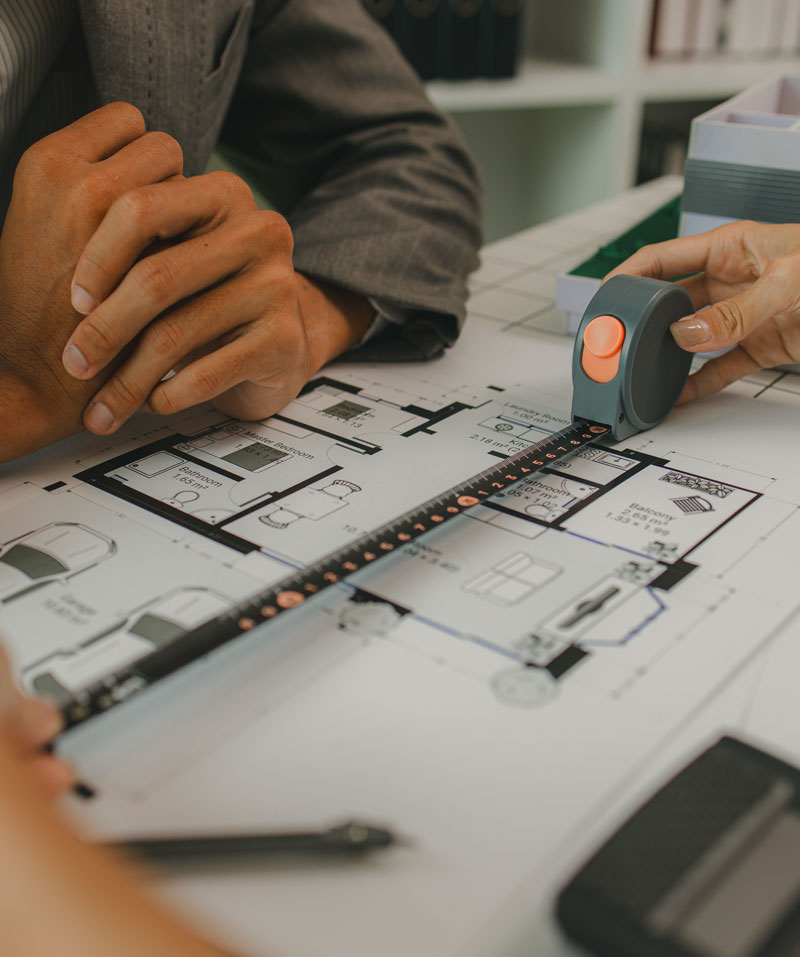
For landscape lighting Denver properties with complex plantings and grade changes, a design pass saves future rework. I sketch beam spreads and aim points, then test with a few temporary fixtures at dusk. Even with experience, the way light rides across flagstone or a stucco wall can surprise you. A one-evening mockup often revises fixture counts down, which pays for the time.
Installation details that prevent headaches
Aim to keep splices out of irrigation zones. I have opened more than a dozen failed junctions sitting in mulch bowls that collect water from drip emitters. Move them to dry pockets or elevate within a weatherproof housing. Where conduit meets earth, use expansion fittings at long runs. Vinyl grows and shrinks in temperature swings, and tight runs will work fittings loose.
Label low-voltage runs at the transformer. A Denver freeze can set for days, and troubleshooting by flashlight in 10 degrees is no time to guess which cable heads to the side yard. Leave a printed key in a sealed bag inside the transformer cavity.
When mounting fixtures to brick or stucco, use proper anchors matched to the substrate. Powder-actuated pins belong to heavier work. For fiber-cement siding, predrill cleanly and seal edges, then mount to a block or backer to keep water paths controlled. With cedar or redwood, isolate dissimilar metals to avoid black staining.
Two real-world examples
A bungalow near Wash Park had bright, cool-tone floods at the front and a habit of lighting the living room through the blinds. The owners wanted security without warning every passerby. We replaced the floods with shielded 3000 Kelvin sconces on a quality photocell and added a narrow-beam motion light above the walkway that only triggers inside a 12 foot cone. They keep a soft edge down the path all night and get a brief bump when someone approaches. Neighbors stopped mentioning the glare, and the couple still see faces clearly on their camera with the warmer light.
In Central Park, a modern home backed to a pocket park. Rabbits and kids tripped their side-yard motion lights every few minutes. We raised the PIR heads to 9 feet, masked the lower third of the field, and shifted to a dusk-to-dawn glow along the fence using 2 watt fixtures with louvers. Motion stayed on the gate itself. The false triggers vanished, and the small fence lights turned the yard into a place they use after dark, not just a corridor to the garage.
A compact comparison to guide choices
- Dusk-to-dawn provides consistent safety and wayfinding, excels at entries and paths, and should be warm, shielded, and modest in output.
- Motion sensing supplies responsive task light, suits alleys, gates, and driveways, and demands careful aiming to avoid false triggers.
- Photocells need separation from the light source and reflective surfaces, while sensors need height, masks, and distance from vents or plants.
- Smart controls simplify seasonal changes and late-night dimming, best used as an overlay rather than a replacement for good placement.
- Material quality matters at altitude, so invest in robust finishes, gaskets, and UV-stable lenses for durability in outdoor lighting Colorado conditions.
Troubleshooting the common flaws
If a dusk-to-dawn light blinks on and off every few seconds, it is usually seeing its own light or a reflection. Shield the photocell, move it, or select a delayed-response unit. If a motion flood fires at every gust, reduce sensitivity first, then mask the sensor, and as a last step remount it away from the source of motion. For repeated nighttime surprises in camera footage, check your time-on settings. A 10 minute dwell time will make you think you have constant visitors. Two or three minutes is enough to unload a car or open a gate.
For dim sections at the end of a low-voltage run, measure voltage under load and rework the layout. Daisy-chained lights across a long bed often deserve a midpoint tee or a heavier cable from the transformer. If LED path lights vary widely in brightness, you may have mixed wattages or old modules. Standardize to a family of fixtures and replace outliers.
For chronic corrosion in fixtures near sprinkler heads, re-aim irrigation away from metal housings and swap to fixtures with better seals and finish. Often, the leak is not rain but overspray six nights a week.
Pulling it together for a Denver property
Exterior lighting Denver projects benefit from restraint, layered control, and durable kit. Use dusk-to-dawn to build a low-glare envelope with warm, full-cutoff fixtures. Add motion where behavior changes or visibility must jump for a short time. Choose materials that shrug off UV, seal every penetration, and keep splices dry. Aim beams onto surfaces instead of into eyes. Pay attention to snow reflectance and wind. Tweak once in each season.
You will end up with paths you trust on icy mornings, a front step that greets visitors without glare, and a yard that feels like part of the house at night. The meter will barely notice. Your neighbors and the night sky will thank you. And if you decide to expand, denver lighting solutions scale well when they start with clear zones and clean wiring. Whether you prioritize denver pathway lighting for safety, denver garden lighting for atmosphere, or denver outdoor fixtures for a modern look, motion and dusk-to-dawn tools will do the heavy lifting, quietly and reliably.