Longevity Boosters: Expanding the Life of Your Interlocking Driveway Paving Installment
Interlocking pavers are just one of the rare building materials that can look better with age, supplied they were installed properly and cared for with a light, constant touch. When I satisfy house owners frustrated by sinking edges or loose joints on a driveway that is just 5 years of ages, the origin almost always traces back to principles. Good water monitoring, a stable base, appropriate edge restriction, and joint stability do a lot of the hefty lifting. Upkeep is not complicated, however it needs to be prompt and right. Get those appropriate and a Driveway Paving Installation can run years with only minor tune ups, also in freeze and thaw environments. The same concepts put on a Sidewalk Paving Setup, though the stakes and lots change.
What adheres to is functional guidance from the area, consisting of the choices that repay during installation and the habits that keep pavers limited, tidy, and silent underfoot.
What Actually Stops working on Interlocking Pavers
It helps to call the normal offenders. Pavers themselves rarely fail. Concrete or clay systems are strong sufficient for car tons. Troubles show up in the layers and the edges.
- Loss of joint sand enables pavers to wiggle, which accelerates side break down and racking. Without sand, the system quits working as a solitary mat and specific devices start moving.
- Base negotiation produces dips, birdbaths, and running water seams. You see it initially along wheel courses or where a downspout dumps.
- Edge restraint shifts external from freeze heave or tire pressure, often at driveway aprons, curves, and corners.
- Drainage errors fill the base. Water that can not leave will pump fine particles up through joints, producing voids listed below and silt above.
- Deicers and plow blades deteriorate the surface area texture and abrade sand from joints. A lot of damages is advancing over several winters, but a solitary bad period can undo years of good care.
If you concentrate your upkeep around those factors, the remainder is primarily aesthetics.
The Foundations of Durability Beginning on Day One
Maintenance can not take care of a badly built base, so it deserves recognizing what a resilient develop resemble. Whether you are reviewing a professional's proposal or inspecting the job currently done, a few specs anticipate life-span much better than any type of brand name name.
Depth and gradation of the base. For a regular guest vehicle driveway in a pleasant climate, I aim for 6 to 8 inches of compressed, open graded base accumulation, typically called 3/4 inch clear stone, over a stable subgrade. In frost zones or clay dirts, 8 to 12 inches is safer. Open rated base drains faster than thick graded base. Faster drain indicates less frost heave and less pumping. For a Sidewalk Paving Installation, 4 to 6 inches is generally plenty unless it surrounds a driveway or carries hand truck loads.
Geotextile. A woven or nonwoven geotextile in between subgrade and base stops great dirt from moving up. I consider it affordable insurance coverage on any type of clay or silt subgrade. It likewise assists distribute lots across soft pockets.
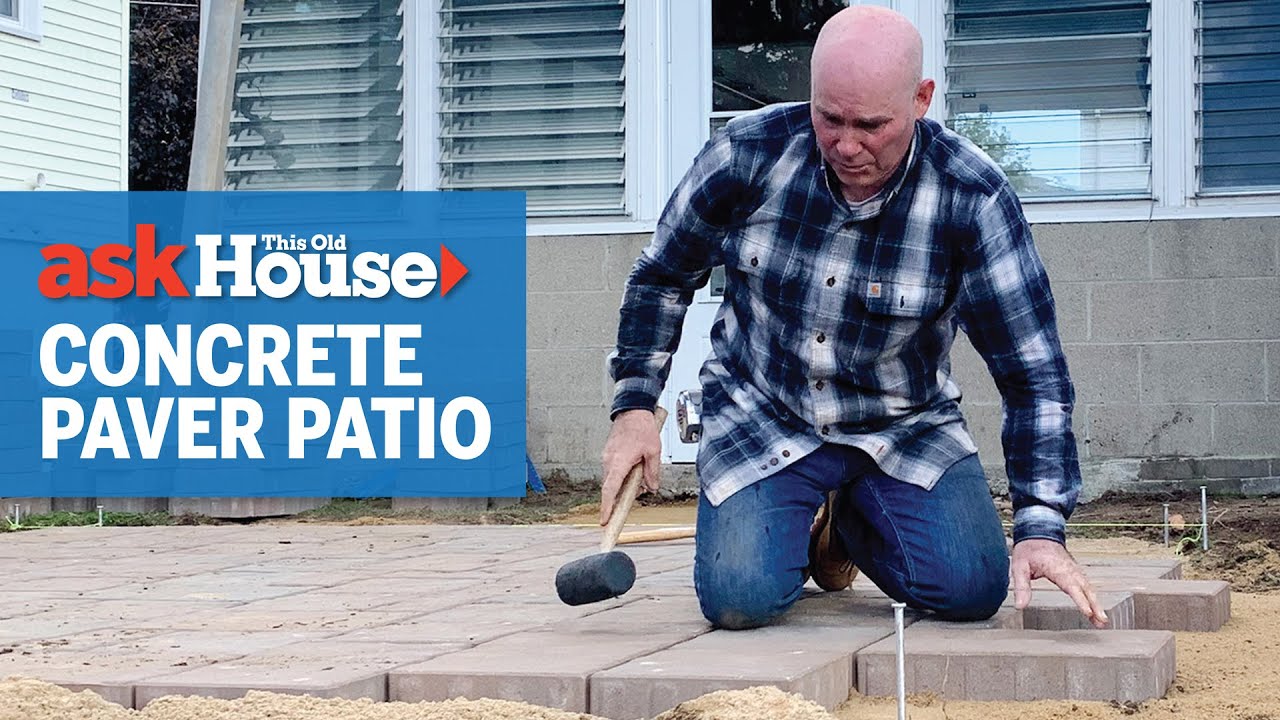
Compaction and wetness control. Compaction is not an occasion, it is a process. Area base in 2 to 3 inch lifts, portable each lift with a plate compactor, and test it underfoot. If you leave heel marks, it is not compacted. Bed patio paving installation linen sand sits above the compressed base, traditionally 1 inch of concrete sand or a produced matching. Maintain it consistent and do not drive the compactor straight on loose sand without pavers on top.
Edge restraint, thoughtfully mounted. Plastic driveway installation contractors side restraints with 10 inch spikes are common, but they should rest on the compressed base, out the loosened bed linens. In high stress areas, a concrete curb or a concealed concrete toe holds up better. At apron changes, connect the paver edge right into the concrete with a mechanical trick or a soldier program bedded in mortar over a footing. That is where I see the most sneaking from transforming tires.
Pattern and unit dimension. Vehicular surface areas take advantage of interlock in two directions. Herringbone at 45 or 90 levels resists transforming far better than running bond. Bigger layout slab pavers can function, but the base has to be near perfect and the edges strong. For tight contours or steep inclines, little units weaved with each other more securely.
Permeable variants. If you selected a permeable system, your maintenance emphasis shifts to joint rock cleanliness and seepage. The base is thicker, generally 12 to 18 inches of open graded stone layers. Done right, an absorptive driveway takes care of freeze and thaw wonderfully, but you have to shield it from sediment.
Good installers deal with these information as nonnegotiable. If your driveway predates these standards, do not panic. Many issues are functional. The faster you correct water and sides, the longer the repair work lasts.
A Simple, Seasonal Maintenance Rhythm
The most resilient driveways I maintain follow a rhythm that barely qualifies as a chore listing. The factor is to disrupt little problems prior to they grow teeth.
- Spring: Examine after thaw. Search for sand loss, tipped boundaries, or brand-new dips. Tidy and re-sand joints that have opened up. Inspect downspouts and close-by beds for washout paths. Area reward moss or algae if the driveway is shaded.
- Early summer: Deep tidy to get rid of wintertime grit and any deicer deposit. Think about a light sealer rejuvenate only if water no longer beads and the surface looks milky. Leading up polymeric joints in high web traffic zones.
- Mid autumn: Last rinse, leaf stain avoidance, and a quick pass with a blower to clear organics. Confirm joint sand is within 1/8 inch of the chamfer ahead of freeze season.
- Pre-storm prep: Mark borders for snow removal and established blade or snowblower skids to avoid messing up paver edges. Supply a paver risk-free deicer if you use them at all.
Most of this takes a couple of hours one or two times a year for a regular 800 to 1,200 square foot driveway. You do not require to infant it. You do need to be consistent.
Cleaning Without Removing the Life Out of It
I have seen much more damages from excitable stress cleaning than from ten winters of salt. High stress aimed near the surface blows out joint sand and roughes up the face of the paver, which then takes dirt faster. If you must utilize a washer, keep pressure around 1,200 to 1,500 psi, hold the stick no more detailed than a foot off the surface, and use a rotary surface cleaner to level the pass. Frequently, a stiff mop, a yard hose, and a mild detergent do just as well.
Stains inform their story if you look carefully. Oil places respond to an oil emulsifying cleaner and perseverance. Apply, allow dwell, perturb, and rinse. For corrosion, make use of a paver safe corrosion remover that does not contain hydrochloric acid. Organic spots like fallen leave tannins lighten in time with sun, yet an oxygenated cleaner speeds the process. Constantly test in a small location. If the concrete paver surface looks blonde after cleaning up, stop and dilute your method.
Efflorescence, the white haze some pavers develop, comes from salts migrating to the surface. Oftentimes it dissipates by itself after a season of rainfall. If it persists, a specialized efflorescence cleaner removes it, yet leave that for completely dry climate and comply with the item timing carefully. Do not seal over active efflorescence. You trap the salts and the haze returns.
The Sealant Question, Answered With Nuance
Sealer is not a magic shield. It is a device. It can minimize staining, stabilize joint sand, and improve shade. It can additionally make a driveway unsafe, trap dampness, and produce a maintenance cycle you did not require. I recommend customers to delay any sealer for a minimum of 3 to 6 months after installation so dampness can run away and efflorescence complete its early cycle. For several driveways, particularly those in full sun with good grading, that first year without sealer is the very best test. If you like the natural appearance and staining has actually not been a problem, you can miss sealant entirely.
If you do choose to seal, choose breathable, film forming products created for pavers, not common masonry sealants. Water based polymers have boosted considerably in the past decade and are simpler to recoat than solvent based choices. Penetrating sealers safeguard versus water and oil without a sheen, but they do little for color. Gloss or semi gloss improves color however can highlight irregular jointing and comes to be glossy when damp unless you transmit a great grit during application. Anticipate recoat cycles of 2 to 4 years relying on sun exposure and web traffic. The price for high quality sealer and products lands around 0.40 to 0.80 bucks per square foot if you use it on your own, more if you employ it out.
One more detail. Do not seal over dirty joints or damp pavers. Dampness caught under sealer can transform milky or peel. Select a stretch of completely dry climate, verify the surface area wetness is below maker limits, and work in the shade where possible to prevent flash drying.
Joint Sand: Tiny Grains, Big Role
When joints are full and tight, the system acts like a solitary mat under your tires. When they are hollow, pavers shift, the bedding sand breaks loose, and edges reveal stress. You maintain joint stability by covering up as soon as you observe spaces. There is absolutely nothing brave about it. It is a habit.
Polymeric sand, which hardens when wetted, has ended up being the go to in driveways, and forever factor. It resists washout and weeds much better than typical concrete sand. But it is not concrete. It remains slightly versatile and needs the correct amount of water to activate. Insufficient and the top crust hardens while the core stays loose. Way too much and the polymers drift out, leaving a sticky mess.
Here is a brief, field evaluated procedure that has held up for me.
- Clean and completely dry: The surface area should be bone completely dry. Make use of a blower to leave dust from joints. If a few joints perspire, wait. Polymeric sand punishes impatience.
- Fill and shake: Move sand right into joints, then run a plate compactor with a neoprene floor covering over the surface area to shake the sand down. Top up and repeat until joints are filled to concerning 1/8 inch below the chamfer.
- Remove dust: Blow or move all deposit off paver faces. Any type of film left will certainly solidify right into a visible haze.
- Mist patiently: Make use of a fine mist to wet the joints in numerous light passes, allowing the water to penetrate without pooling. Comply with the product's protection and timing, typically two or 3 passes spaced a few mins apart.
- Protect the remedy: Keep off the area for the recommended remedy time, typically 12 to 1 day for foot website traffic and longer for vehicles.
Done meticulously, a resanding holds for several seasons. Expect to take another look at high stress edges and the very first 6 to 10 feet near the street regularly. For permeable installments, do not make use of polymeric sand. Make use of the specified rated stone and preserve infiltration.
Keeping Water as a Close friend, Not a Foe
Water either experiences the system or around it. Problems emerge when it sits in it. See where your roof covering downspouts discharge. If they go down water within a few feet of the driveway, expand them under the pavers or over to a bed. I have actually seen driveways that were flat and true for 10 years all of a sudden establish a rut along a wheel path after a brand-new seamless gutter sent a river across the face.
Grading must move water off the surface area at 1 to 2 percent. In method, you can really feel that with a degree or a ball examination. If water remains after a rain in greater than a shallow movie, intend a correction. Cutting a high area or communicating a reduced section with a touch a lot more bed linens sand is not a large job. Laid off, those birdbaths act like silt catches that after that starve the bedding of support.
If your dirt holds water, take into consideration a very discreet French drain along with the driveway, or at the very least a crushed rock relief trench in planting beds that border the pavers. Roots enjoy water and air. Which brings us to the next point.
Roots, Plants, and Edges That Keep Put
Tree roots do not look for pavers. They seek oxygen and moisture. Compost and growing beds along edges frequently provide both. If you mount brand-new beds, line the boundary with a root barrier or give roots space away from the side. For existing trees, an arborist can encourage on discerning origin trimming that protects the tree and your driveway. I have protected more than one fully grown maple by cutting a couple of exploratory origins and enhancing water drainage, as opposed to criticizing the pavers.
Edges stop working primarily at change areas where different products meet. A timeless example is the joint between pavers and asphalt at the road. Asphalt warms and cools more drastically, then presses versus the pavers. A soldier course with a concealed concrete toe resists that pressure much better than a basic plastic restraint. If you see the very first hint of outside creep, address it quickly. It is much simpler to reset a couple of edge units than to draw back a whole program after a season of movement.
Winter Treatment That Protects Appearance and Joints
Deicers are a trade off. Salt chloride is difficult on steel and surrounding plants, however it is gentler on concrete pavers than calcium chloride at similar focus. Magnesium chloride beings in the middle. Calcium magnesium acetate is kinder to surfaces and plants, but it is a lot more pricey and functions best at moderate cold. With any kind of deicer, dose matters. Apply moderately, let it function, and mechanically get rid of slush. Sand offers traction without chemistry and is friendly to pavers, yet you will need to sweep it in spring.
Snow rakes and blowers do more aesthetic damages than chemistry when made use of carelessly. Fit plow blades with polyurethane or rubber edges. Raise the blade somewhat to prevent scuffing across chamfers. On snowblowers, established skid shoes to leave a thin film. The majority of customers favor a hint of snow left behind to a rash of nicked edges in March.
Sealed pavers can become slick in freeze and thaw cycles. If you went with a high gloss sealant, consider a traction grit additive the next time you recoat, particularly on slopes.
Heavy Lots, Switching Forces, and Smart Usage Patterns
Driveways stand up ideal when tons courses are foreseeable. If you consistently park a heavy pickup, a RV, or get pallet shipments, offer those zones a little extra love. A herringbone pattern under transforming radiuses withstands scuffing. Where you back and turn, a denser edge restriction or a concrete buttocks pays returns. For huge layout pavers, be especially cautious regarding tight turns with studded tires. The edges can spall under torsion. If you are preparing a new Driveway Paving Installation and your way of living consists of frequent trailer auto parking, ask your installer to thicken the base in the initial 10 feet from the street and under common turn arcs. An additional 2 inches of rock is undetectable and very effective.
When and Just how to Raise and Relay
A healthy and balanced anxiety of raising pavers maintains many people coping with dips that are simple to fix. If a local location has cleared up, you can bring up those devices, add or regrade bed linens sand, and relay them. The method is to begin at a seam or boundary, remove the initial piece with care, then zipper the remainder out. Conserve the joint sand. Tidy the bed linens, include a measured 1/4 to 3/8 inch of sand to elevate a shallow dip, screed it flat, and rebuild the pattern. Run a plate compactor with a safety mat over the area to seat the pavers, then top up joints. If the dip returns, the base listed below might be jeopardized or constantly damp. Address that water trouble before chasing after the sign again.
I when passed on the apron of a 12 year old driveway after an utilities reduced resolved along the trench. The home owner expected a jumble look. Once compressed and re sanded, the repair service combined so well you had to recognize where to look to discover it. Interlacing systems shine in repairability.
Special Notes for Walkways Versus Driveways
Walkways live a gentler life, but they have their own peculiarities. Narrow courses with heavy shade grow moss, especially where watering oversprays. Small grade adjustments along a stroll create small steps that capture toes if joints open. A Sidewalk Paving Setup benefits from smaller sized systems and tighter joints to minimize heel pinches. Sealers are usually unneeded and can boost trickiness under dew. If you need wintertime grip on a course to the door, lean on sand and a mop before chemicals. And due to the fact that pathways usually form the border of growing beds, define a clean side with a spade a couple of times a year to prevent advancement over the restraint.
Permeable Pavers: Various Upkeep, Different Wins
Permeable interlocking pavers deserve their own paragraph. Their long life rests on keeping deep spaces in the joints and bed linens stone open. That indicates controlling debris. Move or vacuum the surface area regularly, especially after tornados that move penalties from close-by dirt. If infiltration slows, use a vacuum sweeper to get rid of the leading half inch of joint rock and replace it with clean material of the exact same gradation, usually a tiny, consistently sized chip. Do not cover the joints with polymeric sand or finer product. You beat the style. When preserved, permeable systems brush off freeze cycles because water does not sit in the bedding. I keep a number of absorptive driveways that look and do fresh after greater than a years, with absolutely nothing more than regular vacuuming and leading ups.
Costs and Intervals, Mounted Realistically
People ask for numbers. They work as ball parks, not promises. For a typical 1,000 square foot driveway:
- Light cleansing and joint top up runs a couple of hours of labor and 3 to 6 bags of polymeric sand, usually 20 to 35 bucks per bag. If you employ it, anticipate a couple of hundred dollars depending on access.
- Deep cleansing with a surface area cleaner and detergents, plus resanding, might land between 0.60 and 1.50 bucks per square foot as a solution, more if discolor elimination is significant.
- Edge restraint repair services are medical. A 20 foot section with plastic edge and spikes is a brief early morning. A poured concrete toe or aesthetic at a high stress apron sets you back a lot more yet lasts longer.
Intervals differ by climate and use. Joints at aprons and transform areas might require covering annually. Full driveway resanding drops in the 3 to 7 year variety. Sealants, if utilized, 2 to 4 years. Deep cleansing once a year in snow country, every other year in milder areas. These numbers are conservative and based on what I see throughout projects that obtain constant, thoughtful attention.
A Quick Instance Research study: Two Driveways, 10 Years Apart
Two homes, very same road, comparable dirts. One home owner secured every various other year with a shiny item and stress washed tough each spring. The various other chosen the natural appearance, used polymeric joint sand just where needed, and limited cleansing to a deck brush, light cleaning agent, and a hose pipe. After 10 years, the shiny driveway beamed after fresh work, however the paver encounters felt smoother to the touch and revealed more aggregate from repeated hostile washing. The other driveway had a softer shade yet crisper chamfers and less chips at the sides. Both were level and structurally sound, many thanks to excellent initial bases. The lesson is not that securing misbehaves. It is that process matters. Solid chemicals and high stress wear pavers faster than determined care.
Bringing Everything Together
Longevity is the sum of small, appropriate activities. Choose a thoughtful develop with water drainage and edges that value the loads. Keep joints full. Relocate water off and away. Clean with restriction. Treat winter with respect. Most of all, focus in springtime and fall and act on what you see right away. Interlocking pavers compensate that kind of stewardship. They tolerate repair gracefully and carry the weight of daily life without drama. With the appropriate routines, your Driveway Paving Setup should last longer than a few collections of tires, and your Walkway Paving Setup will stay certain underfoot long after paint and plantings have actually cycled a few times. That is a satisfying sort of resilience, both functional and visible, that you can really feel every time you pull in or take the course to the door.